Settings
Connections
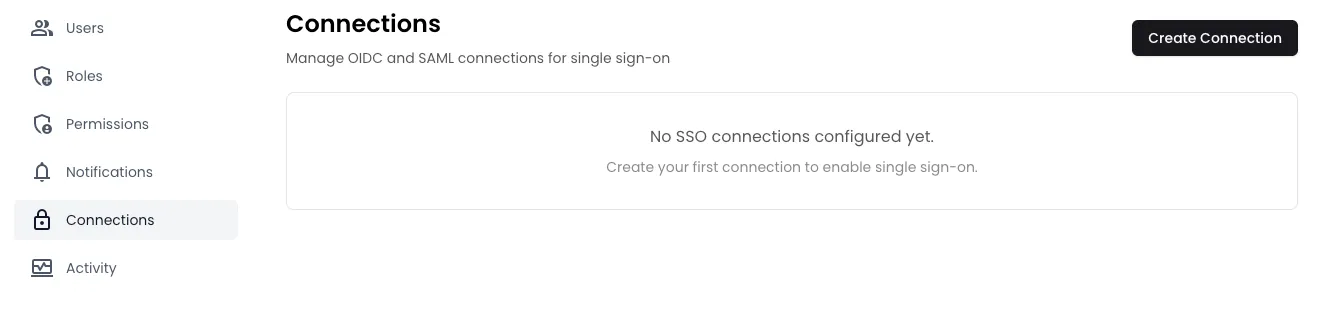
Section titled “Connections”Users with the appropriate permissions can manage enterprise single sign-on connections for their organisation. The Connections feature allows you to configure OIDC (OpenID Connect) and SAML (Security Assertion Markup Language) connections to enable single sign-on for your users.
Note: This section is only relevant if your organisation uses an external identity provider such as Okta, Azure AD, or Google Workspace.
Creating a Connection
Section titled “Creating a Connection”To create a new SSO connection, click the Create Connection button in the top right corner. You’ll need to choose between two authentication strategies:
- OIDC (OpenID Connect)
- SAML (Security Assertion Markup Language)
Creating an OIDC Connection
Section titled “Creating an OIDC Connection”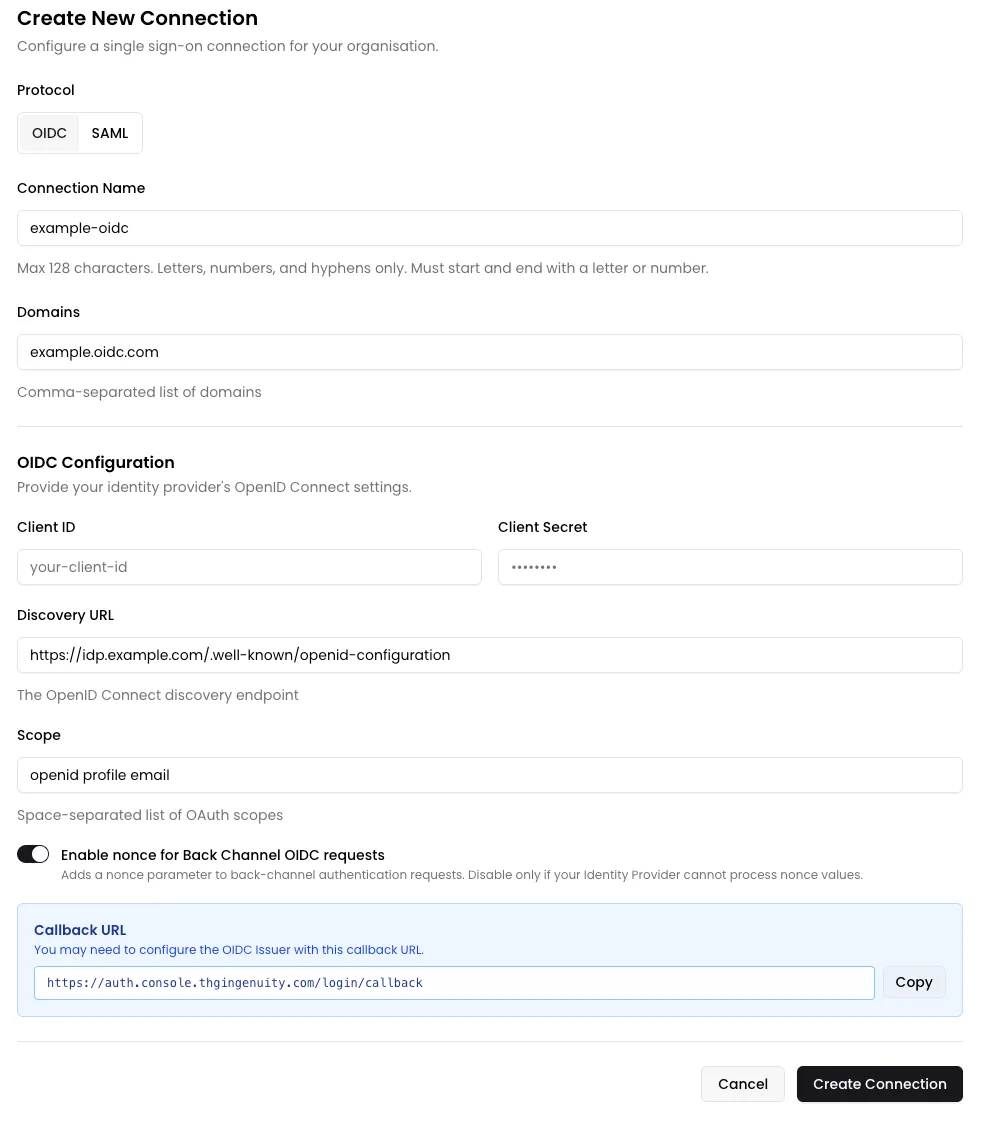
When creating an OIDC connection, you’ll need to provide:
- Connection Name: A unique identifier for this connection (max 128 characters, letters, numbers, and hyphens only, must start and end with a letter or number)
- Domains: Comma-separated list of domains that will use this connection (e.g.,
example.com, example.org) - Client ID: The OAuth client identifier provided by your identity provider
- Client Secret: The OAuth client secret provided by your identity provider
- Discovery URL: The OpenID Connect discovery endpoint (e.g.,
https://idp.example.com/.well-known/openid-configuration) - Scope: Space-separated list of OAuth scopes (e.g.,
openid profile email) - Enable nonce for Back Channel OIDC requests: Toggle to add a nonce parameter to back-channel authentication requests (disable only if your identity provider cannot process nonce values)
Creating a SAML Connection
Section titled “Creating a SAML Connection”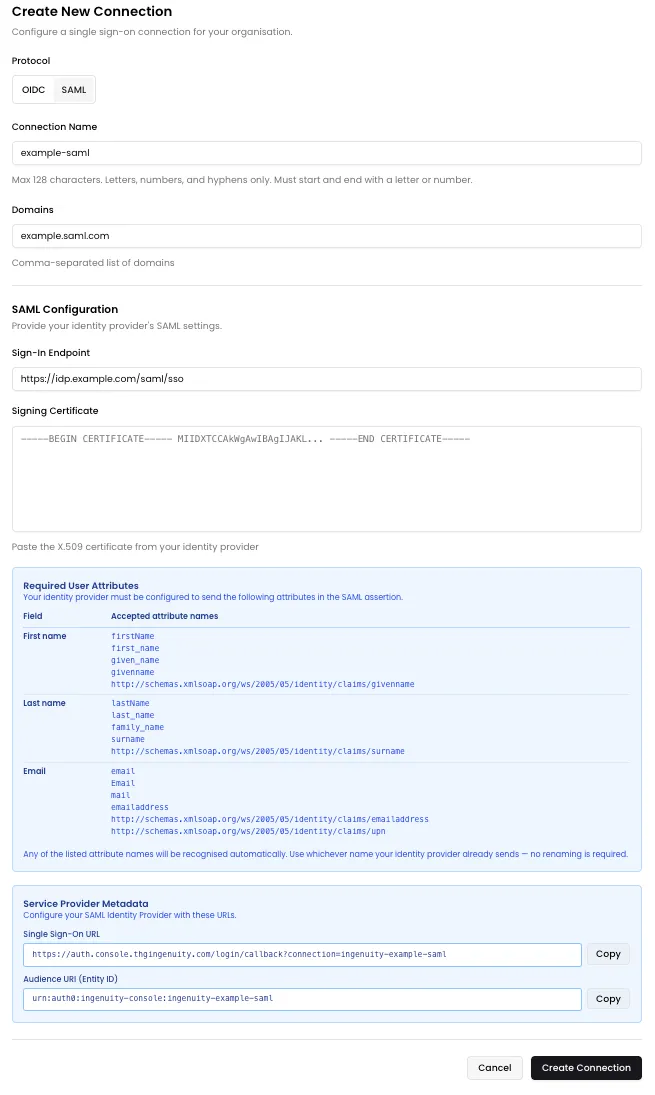
When creating a SAML connection, you’ll need to provide:
- Connection Name: A unique identifier for this connection (max 128 characters, letters, numbers, and hyphens only, must start and end with a letter or number)
- Domains: Comma-separated list of domains that will use this connection (e.g.,
example.com, example.org) - Sign-In Endpoint: The SAML SSO URL provided by your identity provider
- Signing Certificate: The X.509 certificate from your identity provider (paste the full certificate content)
Required User Attributes
Section titled “Required User Attributes”Your identity provider must be configured to send the following attributes in the SAML assertion. Any of the listed attribute names will be recognised automatically — use whichever name your identity provider already sends, no renaming is required.
| Field | Accepted attribute names |
|---|---|
| First name | firstName, first_name, given_name, givenname, http://schemas.xmlsoap.org/ws/2005/05/identity/claims/givenname |
| Last name | lastName, last_name, family_name, surname, http://schemas.xmlsoap.org/ws/2005/05/identity/claims/surname |
email, Email, mail, emailaddress, http://schemas.xmlsoap.org/ws/2005/05/identity/claims/emailaddress, http://schemas.xmlsoap.org/ws/2005/05/identity/claims/upn |
Managing Connections
Section titled “Managing Connections”
Once created, connections appear in a list showing:
- Connection Name and associated domain
- Connection Type (OIDC or SAML badge)
- Enable/Disable Toggle: Control whether the connection is active and can be used to login
- Action Buttons:
- Test: Verify the connection configuration
- View: See detailed connection information
- Edit: Modify connection settings
- Delete: Remove the connection
Viewing Connection Details
Section titled “Viewing Connection Details”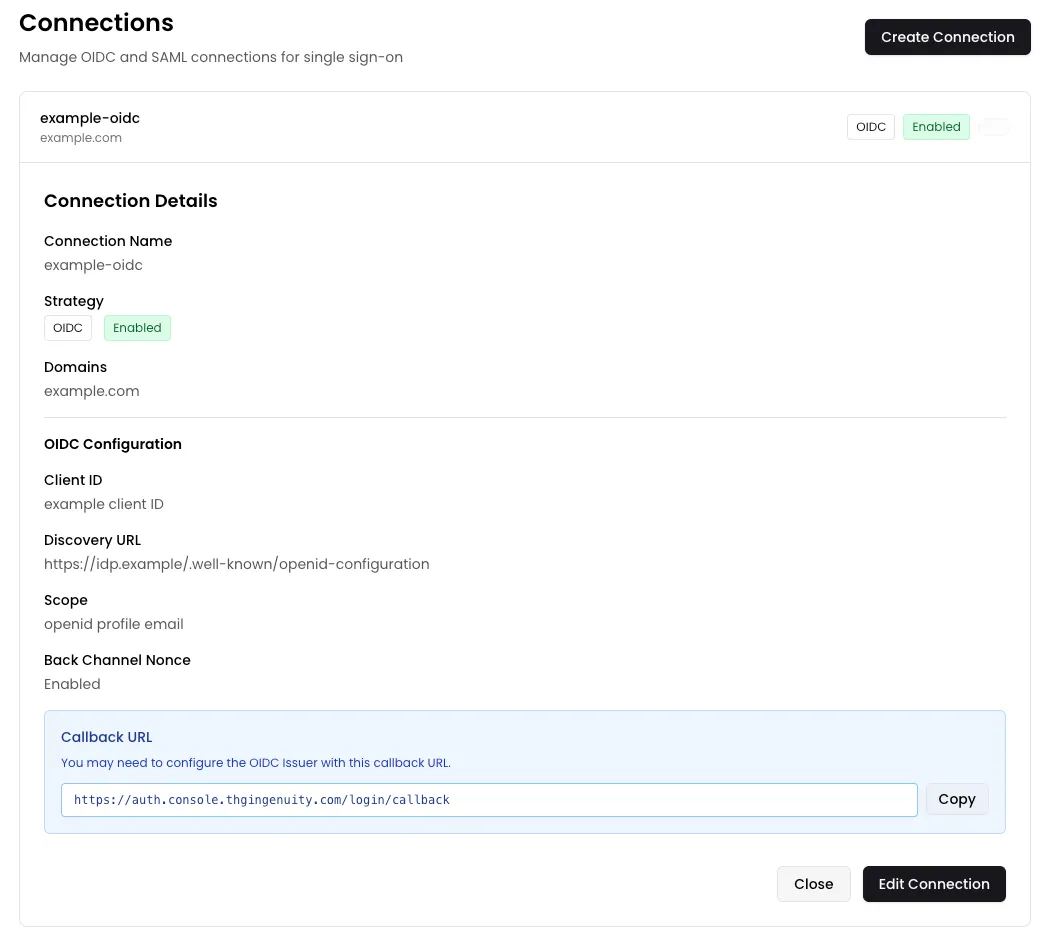
Clicking View on a connection displays all configuration details including:
- Connection Name
- Strategy (OIDC/SAML) and status
- Configured domains
- Full configuration details specific to the connection type (Client ID, Discovery URL, Scope, etc.)
Editing a Connection
Section titled “Editing a Connection”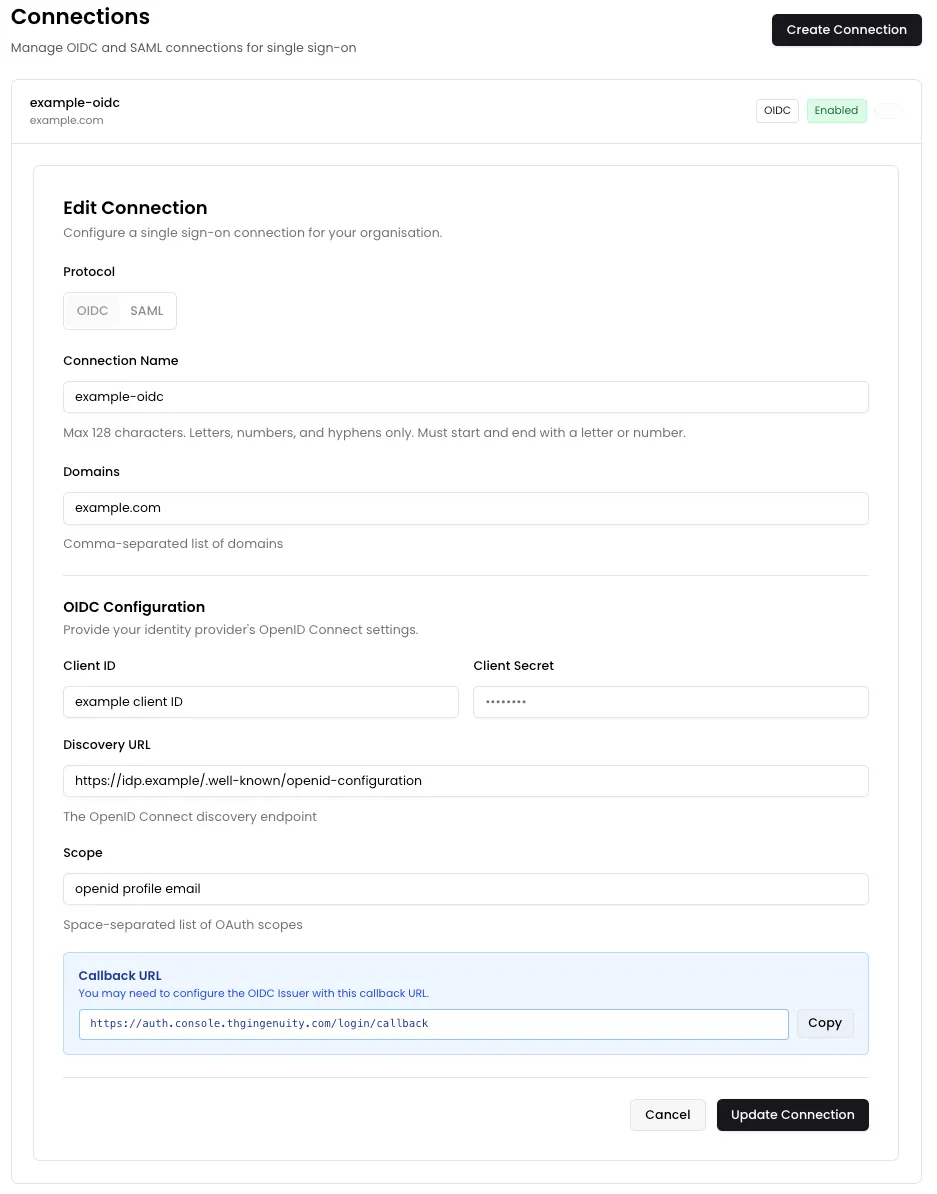
The Edit button opens a form where you can modify all connection settings. The form layout is identical to the creation form, allowing you to update:
- Connection name and domains
- Authentication strategy settings
- Provider-specific configuration
Click Update Connection to save your changes or Cancel to discard them.
Testing Connections
Section titled “Testing Connections”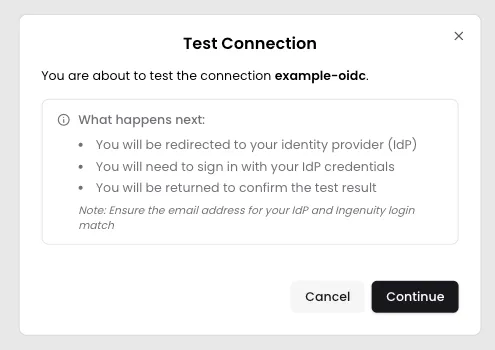
The Test button allows you to verify your connection configuration. When you click Test, you’ll see a modal explaining what will happen:
- You’ll be redirected to your identity provider (IdP)
- You’ll need to sign in with your IdP credentials
- You’ll be returned to confirm the test result
Important: Ensure the email address for your IdP and Ingenuity login match.

Clicking continue will redirect you to your identity provider’s login page to authenticate.
Successful Test
Section titled “Successful Test”
If the connection is configured correctly, you’ll see a success message confirming that your connection works, and you can return to the connection management settings.
Failed Test
Section titled “Failed Test”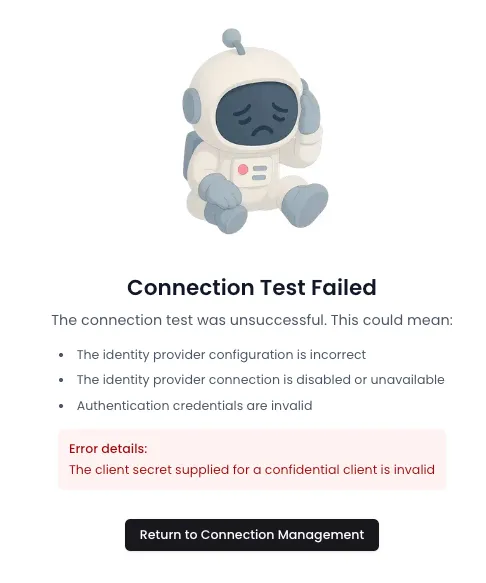
If the test fails, you’ll receive detailed error information explaining the issue. Common reasons include:
- The identity provider configuration is incorrect
- The identity provider connection is disabled or unavailable
- Authentication credentials are invalid
The error details will help you troubleshoot and fix the configuration.